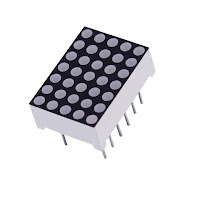
Dot Matrix displays are categorized upon their number of rows and number of columns and size of pixels. Usually, dot matrix displays come in the square shape of 8x8 LEDs but here we are going to demonstrate a 7x5 LEDs Display. The benefit of a dot matrix display is that you will be able to display characters or images using this. The process shown here is very simple to understand but the drawback is that this process consumes lots of pins. If you look at the Arduino in the video below you will see that 12 digital I/O pins are used to control one display. For come controllers, we might not have 12 I/O pins at all. The process of overcoming this scenario we will discuss in our next blog.
Things we need:- Arduino
- 7x5 Dot Matrix Display
- 330 Ohms - 7 Nos
- Dot Vero (KS-100) or Bread Board
- Jumper Wires
- Soldering Kit (Not required for Bread Board)
Connection Diagram:
Connect the pins as described then upload the code below. The first code is about displaying a heart in portrait mode and the second code is about displaying the same heart in landscape mode. Check the results in the video below.
Source Code:
Video:


No comments:
Post a Comment